
By Dr Tristan Jenkinson
The CSI Linux CTF – Shake the Cobwebs
As many of you may have seen, I took part in a Capture The Flag competition run by CSI Linux over the Christmas period (titled “Shake the cobwebs”), and was really pleased to finish first!!
This was the first CTF that I have taken part in where the approach was to solve all the clues, and then provide a report writing up the findings and methodology. Many CTFs are set up so that you gain points for each section that you solve (and sometimes the quicker you solve it, the more points you get). I really liked this approach… though it did mean that I spent probably more time than I should have done writing up a report document over Christmas… and less time that I probably should have spent helping Santa with the wrapping…
I really enjoy CTFs, and think that they are a really good way to keep skills sharp, pick up new tips and tricks, and sometimes to use new software that you may not have had the opportunity to use before. They need problem solving skills, research skills, as well as the skills and knowledge expected for the specific CTF (be it digital forensic skills, OSINT skills, cyber security skills etc.). These are skills that any investigator, regardless of discipline, should be looking to develop.
If you haven’t already, I would thoroughly recommend having a play with this. The challenge is still online and you can find it here. Spoiler alert – I’m about to dive into the solution, so if you want to play with this yourself, don’t read any further. You can always come back another time if you get stuck (and I mean REALLY stuck… keep going and keep trying… persistence is another good investigator trait to develop!)
As the CTF involved writing up a report, I thought that I would share my report here, as it might be of interest or of use to others on casework, testing, or just for the fun. The report is in a semi-formalised style because I thought that might be fun. I hope you enjoy it.
I have split the report into a few separate blog articles, as its quite long… this first section goes through the introduction, and the first puzzle, which is around audio analysis.
Enjoy!
Section 1 – Introduction
Background
The CSI Linux team received an audio file indicating that their data has been compromised. It appears that a third party has access to (at least) some of their recorded audio content. CSI Linux believe that this breach may be related to Command and Control infrastructure running on an Internet of Things device within their office.
The compromise has stopped all production for the CSI Linux team, and they are looking for assistance relating to the compromise so that adequate countermeasures can be put in place.
Instructions
I was initially instructed to investigate and provide details relating to the audio file that was received. Further requests for assistance were made on a continual basis as the investigation progressed, with discrete requests for assistance on specific points. For ease of reference, these discrete requests will be referred to as questions and will be numbered appropriately in chronological order. References to these questions may also be abbreviated, for example Q1 for question 1 etc. Copies of all questions are provided within this report. The answers to the specific questions are highlighted in green bold lettering.
Initial information, as provided at https://csilinux.com/files/stories/Operation_OShINT_-_Shake_The_Cobwebs.html is included below:

Section 2 – Audio Analysis (Q1)
Q1: The audio file
The details provided in relation to Question 1 are below:

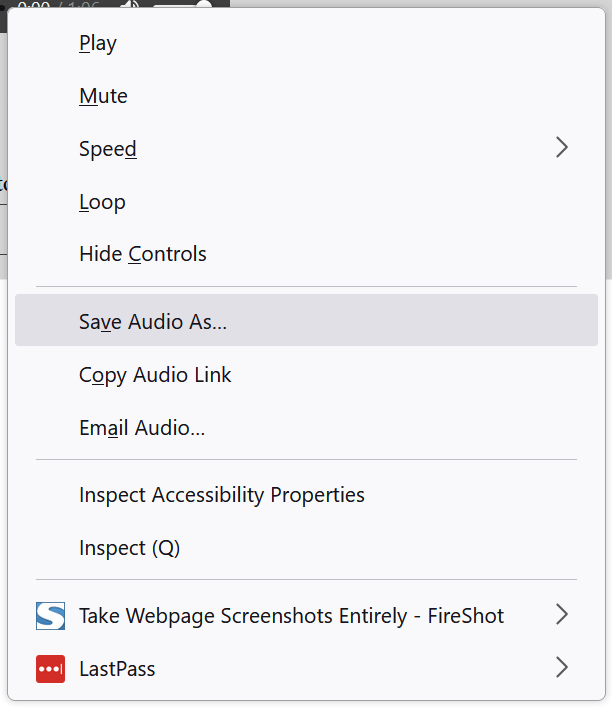
I downloaded the audio file, by right clicking on the audio player and selecting “Save Audio As…” as shown in the below screenshot:
I note that preserving the audio file in this way is not ideal for investigative purposes. As noted in the details of the question, the audio file was received via email. I would typically recommend that the full email and its attachment be preserved in a forensic manner. This was unfortunately not possible at the time of the investigation.
I note that to download the file from the player (as it appeared in my browser), there was no “hamburger” option in the player (as seen in the screenshot). I therefore considered that the reference to “3 dots” may relate to something else, and could perhaps be an indication that the CSI Linux team were aware that “dots” may be relevant, perhaps hinting at the use of Morse code, for example.
Listening to the file
Listening to the file, it appears to contain audio content relating to CSI Linux. For example, it starts with “Welcome to Lumon Radio, a tutorial on CSI Linux and OSINT”.
Listening to the audio carefully, there is a strange noise around the one minute mark. Further analysis of the file may provide more information on this.
EXIF Information
In order to see if there is internal metadata which may assist with the attribution of the data, I ran the file through EXIFTool. This is a free tool written by Phil Harvey, and is available at https://exiftool.org.
I ran the downloaded audio file through version 12.31 of EXIFTool using the below options –k –a –u –g1 –w –txt. More information on these options can be found on the EXIFTool site listed above.
The options above create a text file containing the information that EXIFTool is able to extract. A screenshot of the results is shown below:
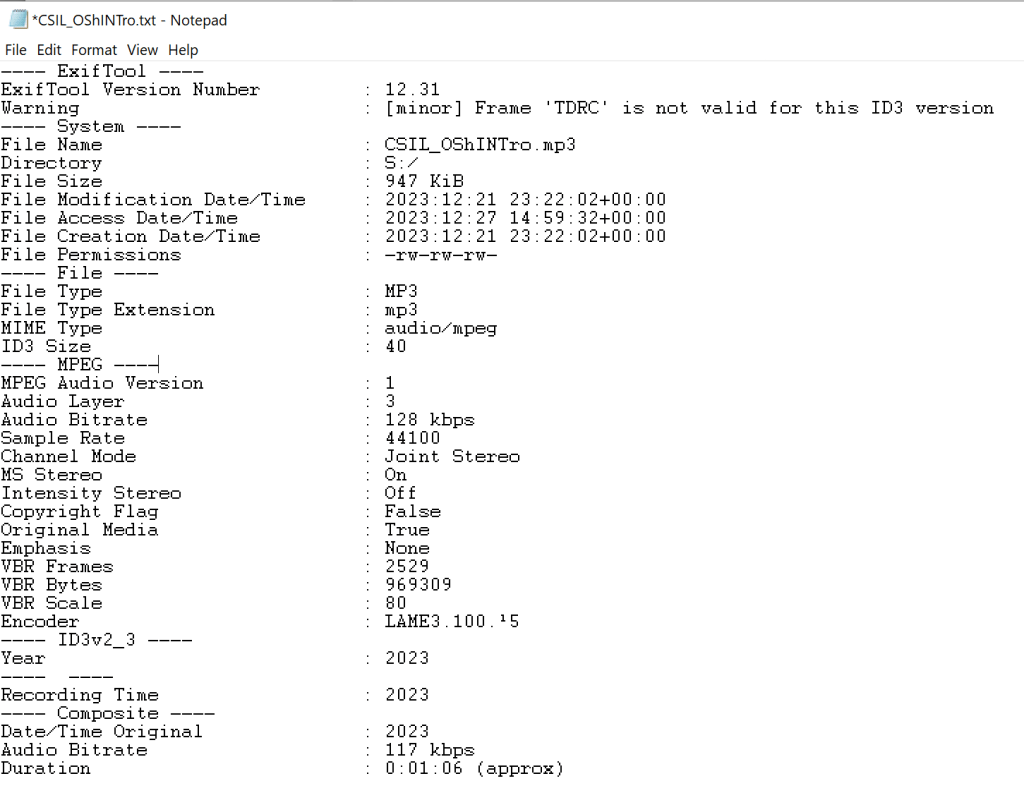
This does give us a minor warning that there may be an ID3 issue with the file. This could be related to ID3 metadata tags being removed from the file, or not being correctly imported or exported when this version of the file was created.
The information from EXIFTool does not immediately appear to be helpful in attribution of the file to anyone.
I therefore proceeded with further analysis.
I opened up Virtualbox (version 7.0.12), and opened up a virtual machine running CSI Linux 2023.2 (which can be downloaded from https://csilinux.com/csi-linux-downloads/).
To perform the audio analysis, I used Audacity. Audacity is a free open source audio tool which can be used for analysing and editing audio files. It is available for Windows, Mac and Linux based systems.
Installing Audacity in CSI Linux
To install Audacity in my CSI Linux VM, I opened up a terminal window, and entered “snap install audacity”, as shown below:

I was then prompted for the password. I am running a default instance of the CSI Linux virtual machine, so the default password is in place. As per https://csilinux.com/csi-linux-downloads/ this is “csi”.

I received the following confirmation, verifying installation of Audacity version 3.1.3:

To run audacity, I ran the command “audacity” in the terminal.
I received the below notification:
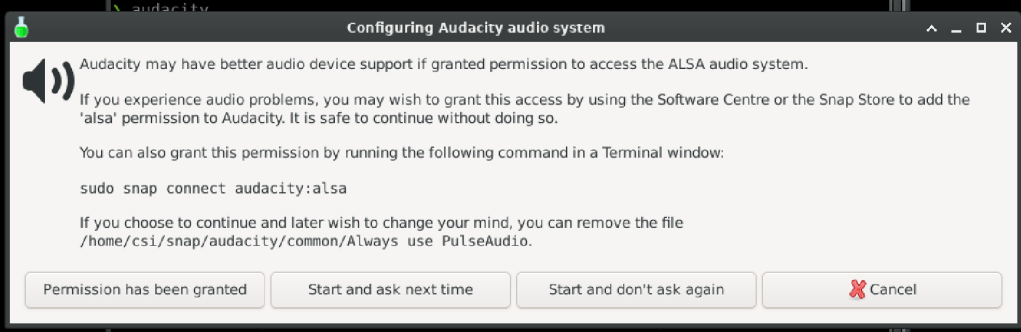
I selected “Start and ask next time”.
Audio analysis in Audacity
With Audacity running, I opened a copy of the downloaded audio file (Using File, Open).
Audacity then shows the audio file in waveform:

The waveform of the audio appears quite unusual. Most of the information is being included on a single channel (the top, or left channel). The screenshot also shows that some information is included in the bottom (or right) channel, though this is much lower in amplitude, so will be much quieter when the audio is being listened to. Typically audio information is split in a more equal manner (amplitude wise) between the channels.
On the left hand side of the waveform of the audio, there is a sliding scale for the left and right channels. Moving this to the right means that I was able to isolate just the right hand channel. Listening to this, I could hear what appears to be Morse code from approximately 13.5 seconds into the recording to approximately 57 seconds into the recording.
There is then a separate noise from approximately 59 seconds into the recording, until approximately 1 minute and 4 seconds into the recording. This separate noise sounds like some sort of synthesized sound.
While I am able to listen to just the right hand channel using this specialist software, for ease, I created a separate file of just the right channel.
To do this, I first split the audio track, to do this, I right clicked on the track on the left hand side (where the file is reported as Stereo, 44100Hz 32-bit float). I then selected “Split Stereo Track” from the menu as shown below:

This splits the single stereo track into two separate audio tracks, as shown below:

I can now close the top track to leave me with just the right track:

I then used the File, Export option and selection “Export as mp3” as below:

To see both the apparent Morse code data, and this second apparent signal at the end of the file in more detail, I used spectrogram view.
Spectrogram View
To turn on spectrum view, I clicked on the dropdown next to the track name, as shown below:

I then clicked on Spectrogram, moving the view from waveform to spectrogram.
Doing this gives much more clarity on the signal at the end of the recording, which appears as below:

The message “Three Toes” is apparently embedded into the end of the audio recording within the spectrogram view.

The above view shows there are short and long characters, which could represent the dots and dashes of Morse code, as well as spaces (or breaks) between signals, which could represent letter breaks.
I was able to verify that this is indeed Morse code, and was able to decode it. I will discuss the decoding of the Morse code in Section 3 of the report (in Part Two of this blog series).
Verification
To verify the apparent “Three Toes” message, I used a tool called Sonic Visualiser (version 4.5.2) running on a Windows based machine.
Sonic Visualiser is a free tool for viewing and exploring audio data. It is available from https://www.sonicvisualiser.org
I opened up a copy of the downloaded audio file. I saw the same layout of the file, with most information in one channel.
Using the layer menu option, I added a spectrogram view for the second channel.

By zooming in on the relevant area, I was able to verify the information seen in Audacity, as shown in the below screenshot from Sonic Visualiser:

Answer to Question 1
Though there is no direct attribution regarding the file, it appears that it has been “signed” by someone called “Three Toes”.
I therefore provided this as the answer to Question 1, in lower case, as was requested by the client in the initial information.
Answer to Question 1: three toes.

5 thoughts on “Shaking the Cobwebs CTF Part One – Audio Analysis”